Saturday, January 21, 2012

The 6 stages of learning a new software

It seems that every time I learn a new software, I go through these same stages.  If you're in Stage 2 or 3, maybe this will give you hope. At the very least, maybe this will give you something to smile about.


The 6 stages of learning a new software


  1. Ecstasy. You buy your new software. You are bursting with hope and expectation of all the awesome things this software will enable you to do.
  2. Confusion. You don't know how to use the software.
  3. Frustration. You are learning how to use the software. Sometimes you want to blow it up. Your hope has vanished like snow in a fire; you will never be able to use this software; it's impossible; it's stupid.
  4. Rejoicing. Slowly, you're starting to understand how to use the software. You become increasingly comfortable and fluent with it. Your friends and family think you're weird, as you rejoice every time you successfully do something with it. (This is, probably, the funnest stage -- and maybe the funniest as well.)
  5. The finish line. Gradually, before you know it, you're practically a pro. You are completely comfortable and fluent with the software. It becomes like a third arm, an extension of you -- like driving or walking. There's nothing you can't do... although admittedly, the software is less exciting now.
  6. Repeat. One of your friends buys the software, and you can't understand why it's so hard for them.


Sunday, January 15, 2012

Render problems in Bryce

So, you're rendering an image in Bryce, and it looks all nice: it's positioned right where you want it, the lighting is finally perfect, the materials look great, and you're ecstatic about your finished creation, until... you run into a problem.

You go to File, and click "Save image as", saving your rendered image on your computer. Then, when you open the image on your computer, you cry, "WHAT?!"

The image on your computer does not look like the image you rendered in Bryce. The objects are not positioned within the frame in the way you wanted. It looks like the camera zoomed out or moved to the side. For example, something you centered is now way off to the side, and something to the side is now centered.

What happened?

Likely, the problem is that your Document Resolution is larger than your workspace in Bryce. In other words, you are creating an image that is bigger than your computer screen can display! The solution is either to use a larger computer screen, or just decrease your document's resolution.

To do this, you need to open the Document Setup dialog box. This appears when you open a new document, and it can be accessed under the File menu (see the image below).


You can change the resolution to fit your screen by typing numbers in the text fields at top:


My screen so happens to fit 1120 x 660 pixels. If you don't know the size of your screen, you can experiment with numbers until you figure out what it is. 

Here's what a screen looks like with a resolution smaller than the screen's display:


Here's a screen with a resolution at the right size:


Now, your saved images should look the same as they do in Bryce!

For more details on using the Document Setup box, check out this tutorial at robinwood.com

Happy rendering! :-)

Saturday, January 7, 2012

How to make Calvary Hill on Bryce

Last night, after posting the "How to make a 3D snowflake on Bryce" tutorial, I had a burst of inspiration. I was too excited to wait until the next day to try it out, so I stayed up late making this:


Now I'll show you how I made it. I used the same technique described in the "How to make a 3D snowflake on Bryce" tutorial. If you haven't already, read that tutorial first, so you can understand the basics before reading this tutorial. (I won't give as many specific instructions in this tutorial; just the general steps.)

Part 1: Photoshop


Open Photoshop.


Create a new layer.


With the Paint Bucket tool, fill the background layer with black.


On the new layer, use the rectangle tool to create two white rectangles, overlapping like a cross.


Save the file as a JPEG.

Part 2: Bryce


Open Bryce. Create a symmetrical lattice.


Open the editing window.


Upload the cross picture and click "Apply".


Exit the editing window. Flatten, resize, rotate, move, etc. to get the size, proportions, and position you want.


In the Materials Library, select "Cedar wood". If you want, you can render the image and see what that looks like.


Create a new terrain, and make a flat hill. (I hope to create a tutorial sometime soon with more details on how to edit terrain in Bryce.)


If necessary, resize the hill to get the proportions you want.


Move the cross.


Duplicate the cross.


In the "Sky & Fog" menu at the top of the screen, enter the Sky Lab. Then open the Sky & Fog Library.


In the Sky & Fog Library, choose the "Golden Haze" sunrise.


A test render will show something like this:


In the Sky & Fog menu, you can adjust the position of the sun to get it right where you want it.


After adjusting the sun and moving the camera to your liking, you can then get a finished result something like this:


A final side note...


Art is something God created. It is unfortunate and sad that many kinds of art, including 3D computer art, are often used for dark, disturbing, sensual, and evil purposes. Let's remember that even 3D art can be used in a way that glorifies God, and showcases light, hope, and beauty -- in the way he sees it!

Saturday, December 24, 2011

What is a green screen?

Today's video tutorial explains what a green screen is, how it works, and how you can buy one yourself.  This video is based on a speech I delivered in a contest on December 8.

Coming soon: Part 2, "How to use a green screen with iMovie"


Read the entire script below:


Have you ever wanted to be a flying superhero in the sky? Or maybe this: a fantastical creature with wings or faun legs, like a character from the Narnia movies? Well, with a green screen, you can! Green screens are what allows movies to put their actors in alien locations or with fantasy creatures. 

Now, you certainly won't be able to create the life-like realism of Hollywood movies, but anyone can create a decent green screen effect at their own home, with a few easy steps and some cheap equipment. As someone interested in filmmaking, I'll show you some of the things I've learned over the years, and picked up through research.

In this video, we'll learn a little bit more about how green screens work, and how to buy one for your personal use. Then, in the next video, we'll learn how to set up a green screen, and how to apply iMovie's easy green screen effect. All right, let's get started!

So, how do green screens work? Let's look at a few examples from movies.


You may have seen the Narnia movies, and the centaur creatures that appear in them. Centaurs look like half-human, half-horses, with the head and torso of a human, and the body of a horse. Now, despite how life-like the centaurs appear in the Narnia films, I can guarantee you that the filmmakers did not go out into the woods, find a few centaurs, and hire them to act in their movies! So, how did they make the real actors look like they had horse rear-ends? Well, they used green screens. The actors actually wore green pants, which could later be replaced with the computer-generated horse bodies.


Here's another example of green screens being used in movies. You may have seen the Star Wars movies. There are many, many occasions when green screens were used in Star Wars. One of my favorite examples is Anakin's emotional scene in Episode III, when he stands in front of a window, looking out as the sun sets over a science fiction city, and a tear rolls down his face. Now, I guarantee you that when they were filming this, the actor, Hayden Christensen, was not looking out a real window, seeing this city scene! The amazing thing is that Christensen was probably looking at nothing more than a green screen, and yet he still delivered such a powerful performance.


So, how exactly do green screens work? It's a simple act of replacement. The filmmakers film a scene with the green screen; then, later on the computer, they replace that green screen with something else, like a star field, or a horse's rear end. 

It's just like this puzzle. All you have to do is remove the green and replace it with something else. It's that simple.

According to visual effects filmmaker Zach Lipovsky, "Greenscreening is just basically telling the camera to replace anything it sees as green with whatever you want." Of course, this involves a lot of imagination for the actors, as in the case of Hayden Christensen in Star Wars, but it results in a really cool effect. And you can do this, too!

Now that we've looked at what green screens are and how they work, let's look at
how to buy a green screen, so you can use one yourself.

Where should you buy a green screen? I've found that the best place to get a good deal on a green screen is online, on Amazon or eBay.

What should you look for? You want to make sure that the green screen is low in cost, but is also large enough that your actors can move around. When filming with a green screen, the green color has to fill the entire frame (that is, everything you can see on camera) at all times; and if the green screen is small, that doesn't give your actors a lot of room to move around. So, look for economy, and for a large size.

In this video, we've looked at how green screens work, and how to buy one for your own personal use. In the next video, we'll find out how to set up a green screen correctly, and how to use iMovie's easy green screen effect.


Sources used for research:

Guye, Phil.  "Green Screen Technology - A Factor in Many Films Today."  Ezinearticles.com.  16 October 2009.  Web.  14 November 2011.

Hanke, Jeremy, and Michele Yamazaki.  Greenscreen Made Easy: Keying and Compositing Techniques for Indie Filmmakers.  Studio City:  Michael Wiese Productions, 2009.  Print.  (Excerpt found at Books.google.com.)

Narniaweb.com.  Image gallery.  Web.  14 November 2011.

Supershadow.com.  Star Wars Images.  Web.  14 November 2011. 


Thursday, December 15, 2011

How to make a 3D snowflake on Bryce


I made this image a while ago on Bryce, one of my favorite 3D modeling softwares. Bryce specializes in landscape design, but is capable of so much more.

Today, I'll show you how I made this image, with two things: (1) Windows Paint, and (2) a symmetrical lattice (a concept in Bryce).

A side note: I definitely could have used Photoshop instead of Paint. In fact, the process would have been easier, and the results cleaner, if I used Photoshop. However, at the time, I didn't have Photoshop. Besides, this goes to show that you can create a pretty cool effect in Bryce, even with a supporting software as rudimentary as Paint.

Another side note: The technique in this tutorial can be used to create all kinds of hand-drawn 3D objects, not just snowflakes. Try it out yourself and see what you can come up with!

Now, without further ado, how to make a 3D snowflake...

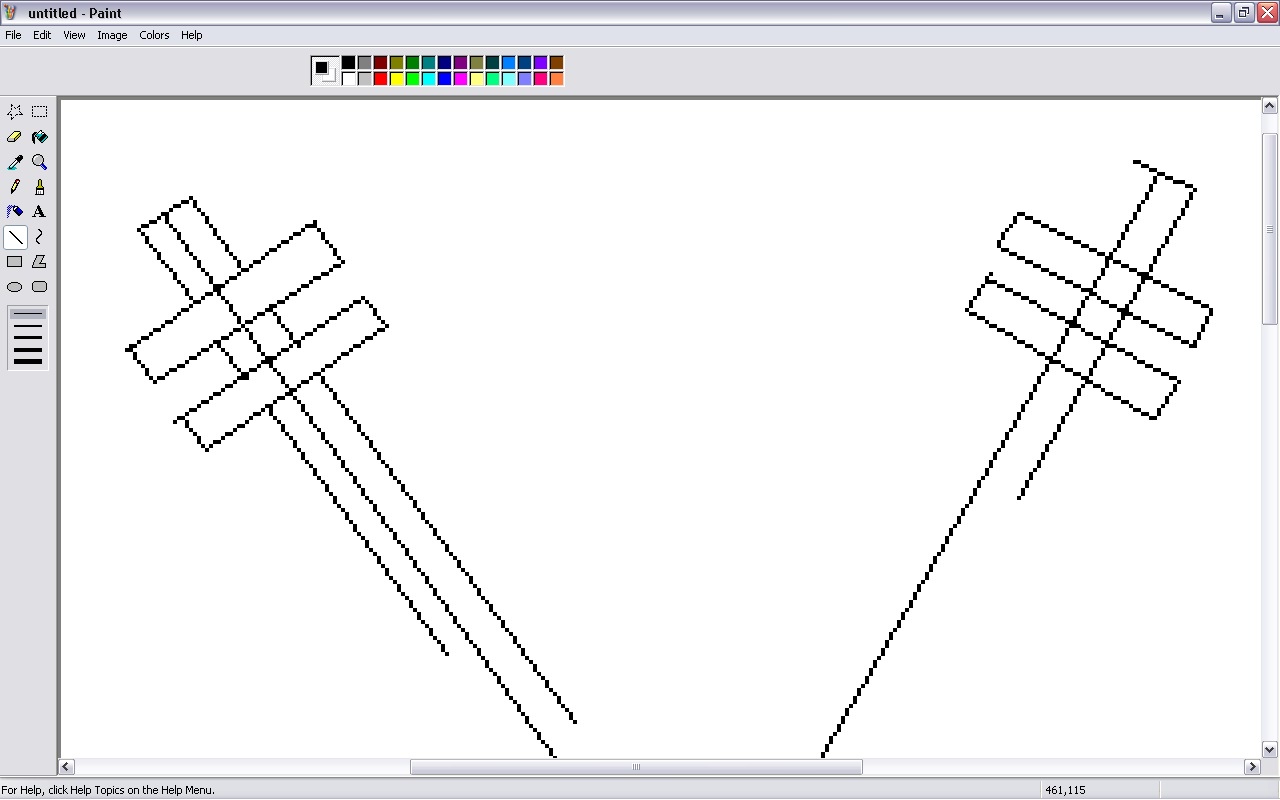
Step 1. Open Paint and create a simple snowflake shape, using straight lines.


(A closer view)


Step 2. Erase all the inside lines.


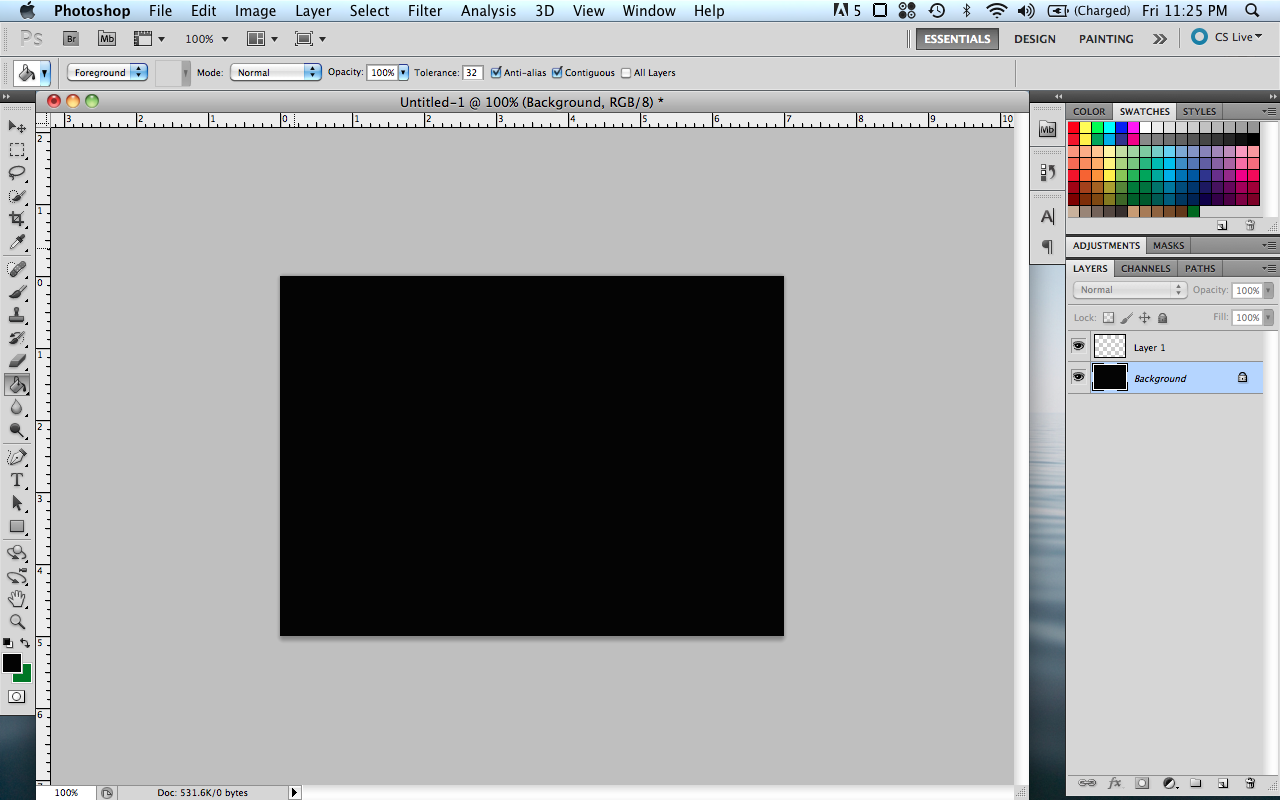
Step 3. Use the "Paint bucket" tool to fill in the background with black.

As you can see, it's not a very clean result, so you may need to paint out those remaining white areas by hand. Just zoom in, select the "Paint" tool, and keep painting around the edges, until everything outside of the snowflake is black. Note: This may be optional, as the snowflake can be further edited in Bryce, but it will at least make things easier later.


Step 4 (optional). If you want, you can prepare the snowflake a little for 3D. A quick concept to understand: When turning a flat image into a 3D one, the darkness or lightness of the image represents distance. Darker colors represent something further away, and lighter colors represent something closer.

For an example, if you were painting a mountain, the base would be black, the slopes would be gray -- getting lighter the closer you get to the top -- and the peak would be white. This is why the background of this image is black.

For this snowflake, you can add a little 3D texture to the edges, by adding two shades of gray (with the darker gray on the outside, of course). But again, this is optional.


Here is the finished design in Paint: (crude though it be)


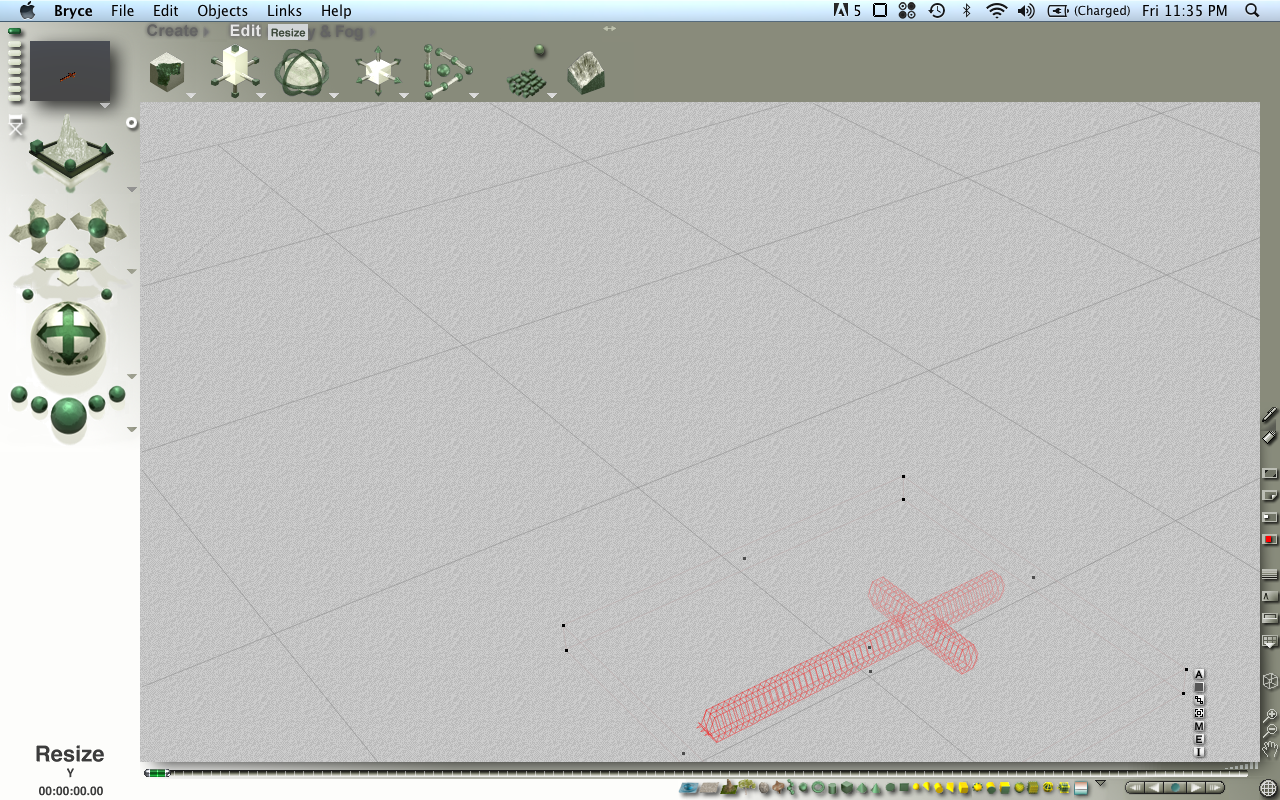
Step 5.
Open Bryce and create a "symmetrical lattice".

In Bryce 7, this can be found in the "Create" menu at the top of the screen, between the stone and metaball.


Step 6. Go to "Edit object", by clicking the "E" button next to the selected lattice. (The "E" button is part of a vertical string of buttons, including "A", "M", and "I", which show up when the object is selected. You'll know it's selected if it's red, like in the picture above. If it isn't selected, simply click on it.)

When you click "E", the editing window will show up.


Step 7. On the right, under "Editing tools", select "Pictures" (if it is not selected already).

You'll see three pictures. Click the "Load" button above one of them, and browse on your computer for the snowflake image you created in Paint; then, click "open".


Step 8. Above the other picture, click "Load", and select the snowflake image again. Click "open".

Then, under Editing Tools, click "Apply".

It should now look something like this:


Step 7. To save your changes and exit the editing window, click the checkmark in the bottom right corner of your screen.

Now your lattice will look something like this:


Step 8. Flatten the lattice by clicking on the black dot directly above it, and dragging your mouse to the left; or, by resizing it through the "Edit" menu (between "Create" and "Sky & Fog") at the top of the screen. (If you resize it through the "Edit" menu, you'll want to resize along the Y axis; again, dragging your mouse to the left.)


Step 9. Enter the Materials Lab by clicking the "M" button (just above the "E" button).


Step 10. Click the triangle, circled below in red, to enter the Materials Library.


Step 11. In the drop-down menu at the bottom, select "Waters".


Step 12. Under the category of "Turbulent", choose "Iceberg".


Step 13. Click the checkmarks to exit from the Materials Library and then the Materials Lab.

Render the image by clicking the big green button on the left of the screen.


The rendered image: Pretty cool! It looks like a crystal snowflake!


With some more tweaking, (e.g., moving the camera's perspective to look up at the sky, changing the sky to look wintery, making copies of the snowflake, moving some snowflakes further away, etc.), I got the finished artwork: