I made this image a while ago on Bryce, one of my favorite 3D modeling softwares. Bryce specializes in landscape design, but is capable of so much more.
Today, I'll show you how I made this image, with two things: (1) Windows Paint, and (2) a symmetrical lattice (a concept in Bryce).
A side note: I definitely could have used Photoshop instead of Paint. In fact, the process would have been easier, and the results cleaner, if I used Photoshop. However, at the time, I didn't have Photoshop. Besides, this goes to show that you can create a pretty cool effect in Bryce, even with a supporting software as rudimentary as Paint.
Another side note: The technique in this tutorial can be used to create all kinds of hand-drawn 3D objects, not just snowflakes. Try it out yourself and see what you can come up with!
Now, without further ado, how to make a 3D snowflake...
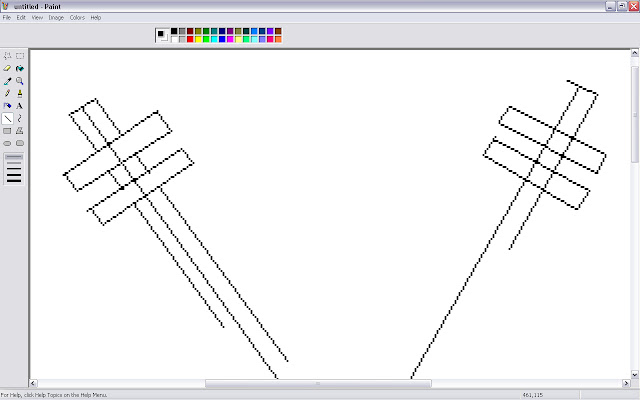
Step 1. Open Paint and create a simple snowflake shape, using straight lines.
(A closer view)
Step 2. Erase all the inside lines.
Step 3. Use the "Paint bucket" tool to fill in the background with black.
As you can see, it's not a very clean result, so you may need to paint out those remaining white areas by hand. Just zoom in, select the "Paint" tool, and keep painting around the edges, until everything outside of the snowflake is black. Note: This may be optional, as the snowflake can be further edited in Bryce, but it will at least make things easier later.
Step 4 (optional). If you want, you can prepare the snowflake a little for 3D. A quick concept to understand: When turning a flat image into a 3D one, the darkness or lightness of the image represents distance. Darker colors represent something further away, and lighter colors represent something closer.
For an example, if you were painting a mountain, the base would be black, the slopes would be gray -- getting lighter the closer you get to the top -- and the peak would be white. This is why the background of this image is black.
For this snowflake, you can add a little 3D texture to the edges, by adding two shades of gray (with the darker gray on the outside, of course). But again, this is optional.
Here is the finished design in Paint: (crude though it be)
Step 5. Open Bryce and create a "symmetrical lattice".
In Bryce 7, this can be found in the "Create" menu at the top of the screen, between the stone and metaball.
Step 6. Go to "Edit object", by clicking the "E" button next to the selected lattice. (The "E" button is part of a vertical string of buttons, including "A", "M", and "I", which show up when the object is selected. You'll know it's selected if it's red, like in the picture above. If it isn't selected, simply click on it.)
When you click "E", the editing window will show up.
Step 7. On the right, under "Editing tools", select "Pictures" (if it is not selected already).
You'll see three pictures. Click the "Load" button above one of them, and browse on your computer for the snowflake image you created in Paint; then, click "open".
Step 8. Above the other picture, click "Load", and select the snowflake image again. Click "open".
Then, under Editing Tools, click "Apply".
It should now look something like this:
Step 7. To save your changes and exit the editing window, click the checkmark in the bottom right corner of your screen.
Now your lattice will look something like this:
Step 8. Flatten the lattice by clicking on the black dot directly above it, and dragging your mouse to the left; or, by resizing it through the "Edit" menu (between "Create" and "Sky & Fog") at the top of the screen. (If you resize it through the "Edit" menu, you'll want to resize along the Y axis; again, dragging your mouse to the left.)
Step 9. Enter the Materials Lab by clicking the "M" button (just above the "E" button).
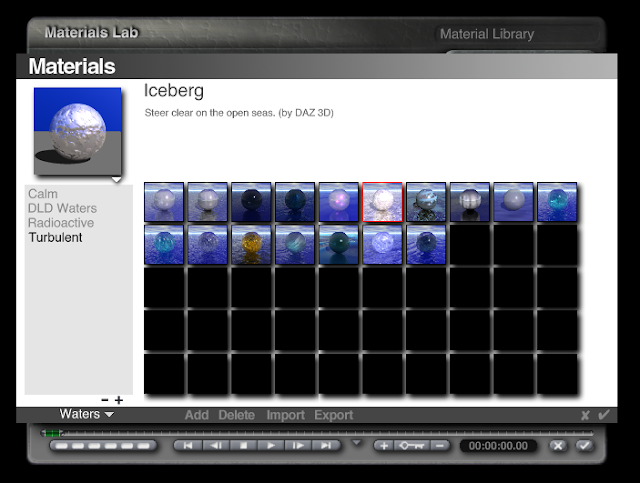
Step 10. Click the triangle, circled below in red, to enter the Materials Library.
Step 11. In the drop-down menu at the bottom, select "Waters".
Step 12. Under the category of "Turbulent", choose "Iceberg".
Step 13. Click the checkmarks to exit from the Materials Library and then the Materials Lab.
Render the image by clicking the big green button on the left of the screen.
The rendered image: Pretty cool! It looks like a crystal snowflake!
With some more tweaking, (e.g., moving the camera's perspective to look up at the sky, changing the sky to look wintery, making copies of the snowflake, moving some snowflakes further away, etc.), I got the finished artwork:


No comments:
Post a Comment