 |
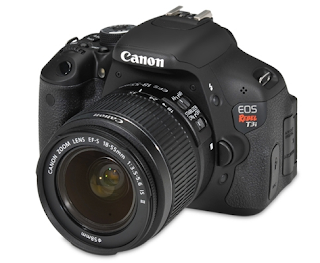
| Canon EOS Rebel T3i digital SLR camera. Picture from retx.net. |
This first photography tutorial is on the concept of shutter speed.
Part 1: What is shutter speed?
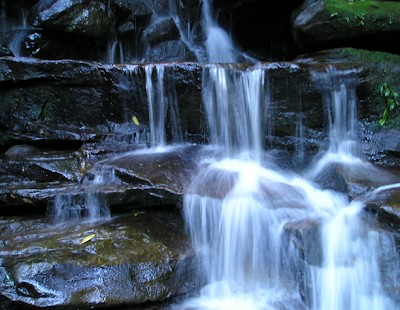
Have you ever seen a photo of a fountain or waterfall, where the water was smooth and blurred? Or a photo of a city scene where the cars seemed to streak by in a blur of motion? (See examples below.)
Smooth, blurred waterfall
From Waterfall by ~xPhate on deviantART
 |
Blur motion
From digital-photography-school.com
Blur motion
From smashingmagazine.com
Or, on the flip side, have you ever seen a photo where a moving subject is frozen mid-action, and water may appear as individual droplets, rather than a smooth blur? (See examples below.)
Frozen action shot
From boston.com
Frozen action shot
From cruzine.com
Well, those pictures don't just happen! They involve a photographer intentionally changing settings on his or her camera to make the image either blurred, or frozen in time. The settings that will effect this are called the shutter speed.
Shutter speed is the speed at which photo is taken. For example, a shutter speed of 1/30 means that the photograph was snapped in one-thirtieth of a second. The faster the shutter speed, the clearer and more "frozen" the image will appear; the slower the shutter speed, the smoother and more blurred the image will appear.
Shutter speed chart
From miketurner-photography.co.uk
Think about it this way: If a photograph is taken at a fast shutter speed (1/100, for example), then the image is being recorded for one-one-hundredth of a second; it is only recording what happened in that extremely brief fraction of a second. It makes sense that that would yield a crisp, frozen photograph.
Alternatively, if a photograph is taken at a slow shutter speed (2 seconds, for example), then the image is being recorded for that much time; it captures all the movement that takes place in that period. The result is a blur.
The differences between fast and slow shutter speeds
From exposureguide.com
From digicamhelp.com
Part 2: How to change shutter speed
The way to change shutter speed on a Canon DSLR is by turning the Mode Dial to "TV" mode.
You can then change the shutter speed by turning the Main Dial, right behind the shutter button. The changing shutter speed will display on the LCD monitor.
Part 3: Applying what we learned
You may be wondering: How fast or how slow should the shutter speed be? The answer is... it depends! While the chart above from Mike Turner Photography is definitely helpful, I will still say that the selection of shutter speed completely depends on what the photographer wants (do you want it to be frozen or blurred?), and on the setting and situation. Experiment and see what you discover!
To illustrate the concepts of this tutorial further, here are some photos I took while experimenting with shutter speed for the first time.
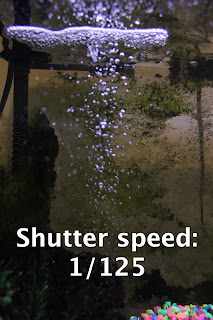
Fish tank bubbles

Notice how, as the shutter speed gets faster, the images get darker. This is because the shutter inside the camera is opening and closing faster, which allows less light to enter the camera. I believe the darkening effect of faster shutter speeds is counterbalanced by adjusting ISO, but that's a skill I still haven't learned, and it would be a topic for another tutorial!
Fireworks
I took these photos this Independence Day! This first photo was taken with a really fast shutter speed (somewhere in the league of 1/200; I don't remember the exact number), causing the firework fountain's sparks to appear as individual particles, like bits of snow or dust. Note also the light-sabers in the back that my brothers were swinging around, but do not look blurred.
Next I took pictures with a really slow shutter speed (again, I don't remember the exact number, but it must have been somewhere between 1/10 and 1"), and I had these fun, fountain looks.
Note how blurred the light-sabers are now!
Returning to a normal shutter speed (somewhere between 1/30 and 1/80) rendered an image that looks more like what we see with our eyes when watching a firework.
Conclusion
There are a lot of things you can do with shutter speed... go have fun with it! Then, come back here for more photography tutorials, coming soon... and leave a comment about what you've been able to do with shutter speed.
Play safe and have a Happy Independence Day!


Thanks. It helps beginner like me to understand well what is shutter speed in no time. Simple. There are many blogs out there that put so many difficult terms in their writings. Since then, for a beginner to understand the simple concept like this has been the most upsetting part in their learning time.
ReplyDeleteHi, Persie! So glad this helped!
Delete